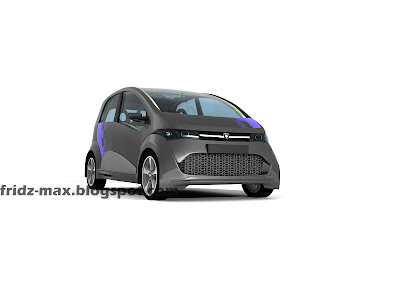
I am still using the Mental Ray renderer on this model. But with a little tweak, I just get what I want. Here are some parameter that's been utilized to get the above photo:
Body color and material:
1) The chrome parts, Matte Finished = Arch and Design (mi)
2) The body color = Car Paint Material (mi) with self design blue chessboard mapping
3) Lower Grill Cover = default color with opacity and bump mapping
Lighting Setup
1) I only use skylight and Scene Environment is turn on (shown in picture below)
2) 1 Target Direct Light with specific angle with Ray Traced Shadows and 0.676 Intensity.
3) and 1 MR Area Omni Light with Ray Traced shadows and 0.4 Intensity
Lets take a look on the light coordination. (picture below)
Render Setup
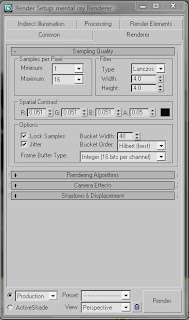
1) On the Mental Ray Render Setup tab, I use Lanczos and min=1 and max=16 Samples per pixel
(Picture shown below)

2) I turn on the Final Gather to Medium preset
3) I also use blank white mapping in the Environment Map
And there is other picture that I want to show off. Thanks


wah..dah buat tutorial sekarang..menarik tu..
ReplyDeleteBro Campro, ni tutorial lebih kurg je. nak tunjuk camne setup render je. sekadar cuba2. bukan pakar pun. huhu
ReplyDeletestudio lighting tutorial eh? bagus2.
ReplyDeleteTapi boleh ke guna Skylight dlm mental ray..?
Animous,
ReplyDeleteRasanya kena pakai skylight jgk. tapi setkan shadow pada Ray Traced.
Tapi xpernah pulak cuba offkan dia.
Ni sebenarnya sama je mcm setting HDRI. tapi environment image guna plain white. jadilah mcm gmbr kat atas tu. Kalau letak plain black pun boleh, tapi kena pandai main lighting laa.
Anyway thanks bro.
Nak prepare teknik buat tyre lepas nih.